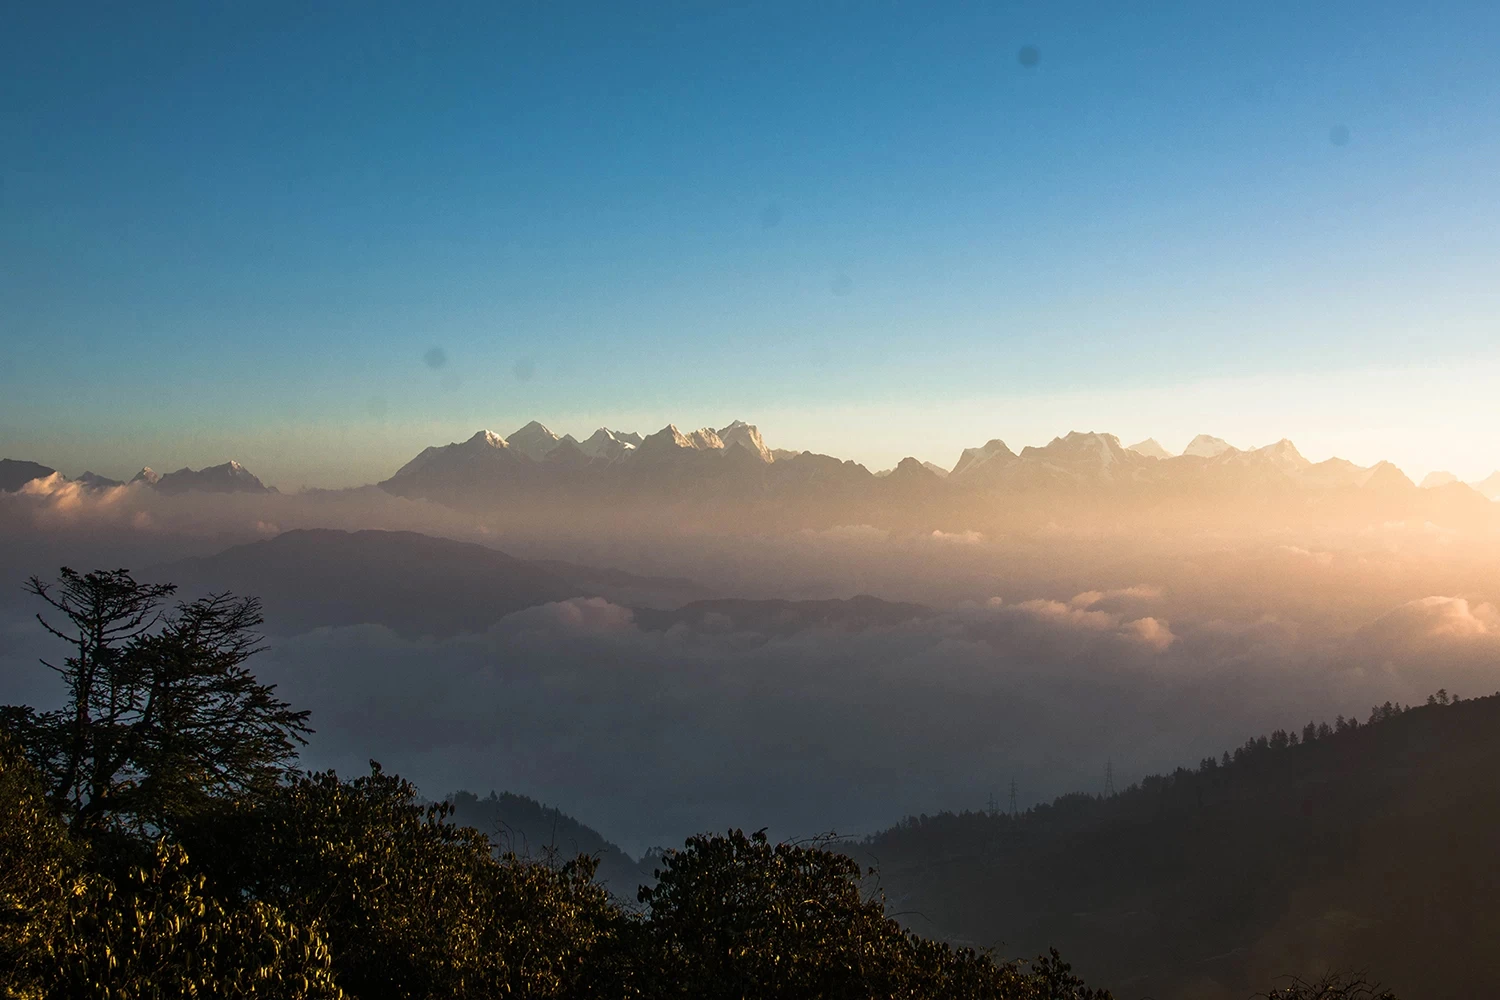
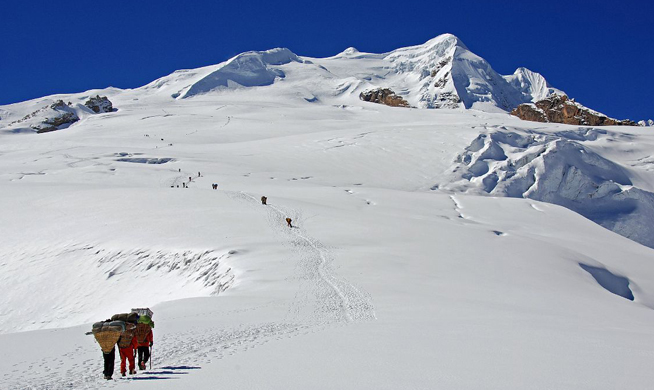
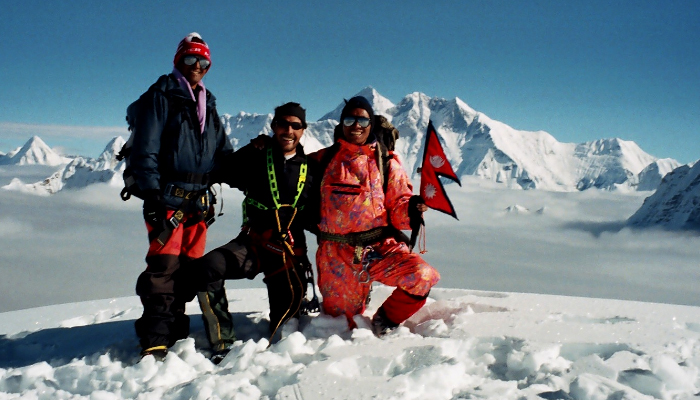
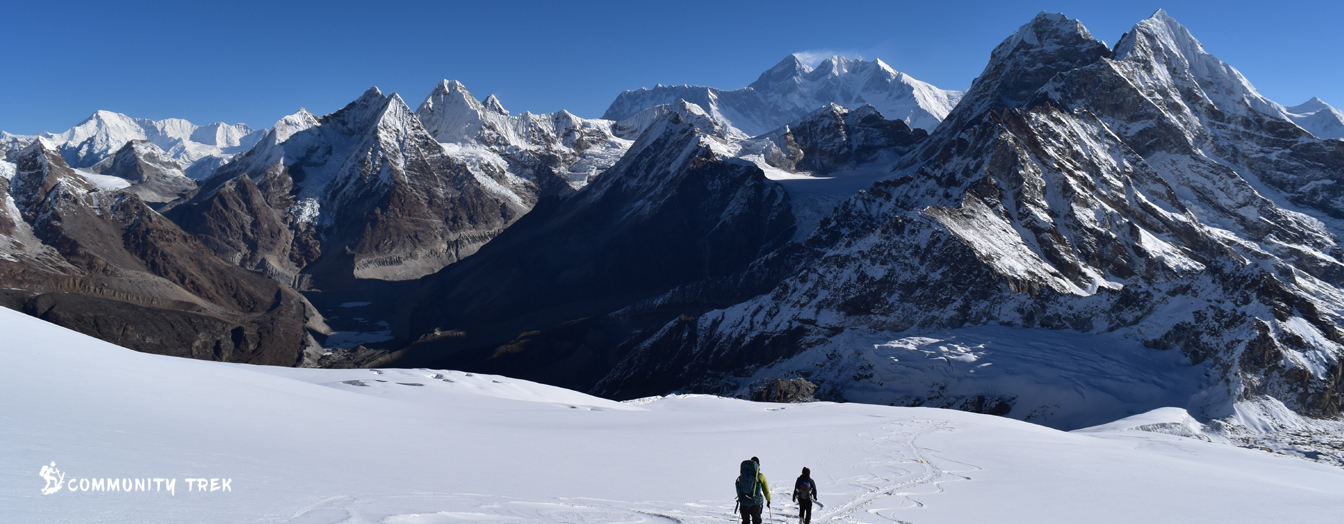
Mera Peak: Rising proudly at 6,476 meters (21,247 feet), this majestic peak beckons adventurers with its stunning Himalayan panoramas and thrilling ascent. Imagine gazing upon the world's highest peaks, including Lhotse and Everest, as you conquer this challenging yet rewarding climb.
More than a physical feat: Mera Peak is a transformative journey nestled amidst the Himalayas' grandeur. Trek through the enchanting Hinku Valley, navigate glacial moraines and conquer the technical summit climb. While not the most demanding, it offers a rewarding challenge compared to other popular climbs.
Ready to plan your adventure? We've compiled all the essential details:
Duration & Timing:
Flexible! Choose a 15-day itinerary for an efficient summit push with acclimatization days, or opt for 20-22 days to leisurely explore the Hinku Valley and soak in the Sherpa culture.
Best seasons:
pre-monsoon (April-May) and post-monsoon (September-November) for stable weather and breathtaking views.
Level of Difficulty:
A challenge for determined souls. While not the most technical, Mera Peak demands mental resilience, physical fitness, and respect for nature. It's classified as Alpine Grade PD, involving some technical climbs and steep terrain, especially the final ascent. Compared to Island Peak, it offers a slightly less daunting climb.
How to Reach Mera Peak for Climbing:
Embarking on the journey to Mera Peak for a thrilling climbing experience involves several options. Here's a guide to help you navigate this exciting expedition:
1. Mountain Flight to Lukla:
- Initiate your journey with a spectacular 30-minute mountain flight to Lukla, Hillary Airport, situated at an altitude of 2800m.
2. Two Trekking Routes from Lukla:
Upon reaching Lukla, there are two trekking routes you can choose from:
- a. Highland Trail: Traverse through Chutanga (2400m), Zatra La Pass (4610m), Thulikharka (4300m), and Kothe (3691m).
- b. Lowland Trail: Explore the lower-altitude trail passing through Paiya (2800m), Bumri (2230m), Pamgkoma (2646m), Nigmsa (2863m), Chetrakhoangla (3150m), Kothe (2691m), Thangnak (4350m), Khare (5043m), Mera Base Camp, Mera High Camp, and finally, the Mera Peak Summit.
3. Summit and Return Options:
After successfully summiting Mera Peak, you can choose your return route:
- Highland Return: Descend through Zatra La Pass and retrace your steps back to Lukla.
- Lowland Return: Descend through Kharikhola, providing the option to drive back to Kathmandu or fly back from Lukla to Kathmandu. Alternatively, continue trekking to Maha Kulung before deciding on your return journey.
4. Ground Transportation Option:
- For those who prefer a land journey without flights, it's possible to drive up to Kharikhola or even Maha Kulung and trek to Mera. Keep in mind that the road trip to the trekking starting point is a lengthy one, spanning almost two days.
5. Considerations:
- The choice between the highland and lowland trails, as well as the mode of transportation, is entirely yours. The highland route offers breathtaking mountain views, while the lowland option provides a more varied landscape experience.
- Opting for the ground journey allows for a unique overland adventure, but it does entail a considerable amount of time on the road.
Permits & Costs:
Key Cost Components:
Permits and Fees:
The most popular and stunning Mera Peak expedition requires special climbing permits and Trekking Permits before heading.
- Mera Peak Climbing permit costs are USD 250 per person in Spring (march to May)
- Mera Peak Climbing Permit costs are USD$125 per person in Autumn (Sep to Nov)
- Trekking permits (TIMS, and National Park fees): USD 60 per person
- Insurance for Sherpa Guide is USD100
Mera Peak climbing package cost:
- Mera Peak Climbing cost for solo is USD 2300
- Mera Peak Climbing cost for (2 to 6 Pax) is USD 2100 P/P
- Mega Peak Climbing cost for (7 to 10 Pax) is USD 2000 P/P
Mera Peak Climbing Package includes:
- Airport pick-up and drop service
- 3 Nights standard accommodation with free breakfast in Kathmandu (2 nights before and 1 night after the trip).
- All the necessary permits and Gov Tax
- Kathmandu to Lukla and Lukla to Kathmandu flights
- Professional trekking guide
- Porter service (2 guests: 1 Porter)
- Full Board Meal in Mountain (Breakfast, Lunch, and Dinner)
- Staff’s salary, flights, room, food, and insurance
- Professional Sherpa Guide and crews for climbing
- All the accommodation in the Mountain (Sharing basis)
- Group climbing gears
Additional Expenses:
- International flights and airport transfers.
- Personal equipment (clothing, boots, climbing gear) – consider renting if on a budget.
- Travel insurance (mandatory).
- Tipping for guides and porters.
- Food and drinks beyond what’s included in your package.
- Personal medication and toiletries
- Miscellaneous expenses like souvenirs
- Rescue and Emergency Evacuation
Factors Affecting Cost:
- Group size: Generally, costs decrease per person as group size increases.
- Season: Spring and fall seasons command higher prices due to better weather and demand.
- Services chosen: Opting for luxury accommodations, helicopter transfers, or additional equipment rentals can significantly increase costs.
- Travel agency reputation: Reputable agencies might charge slightly more but offer better services and peace of mind.
Cost-Saving Tips:
- Book your trip well in advance for early bird discounts.
- Consider traveling during non-peak seasons.
- Research and compare prices from different trekking agencies.
- Rent equipment instead of buying new items.
- Pack light to minimize porter fees.
- Budget for unforeseen expenses like additional gear purchases or medical needs.
Remember: While cost is an important factor, prioritize choosing a reputable trekking agency with experienced guides and prioritizing safety. A successful and enjoyable Mera Peak experience is worth the investment.
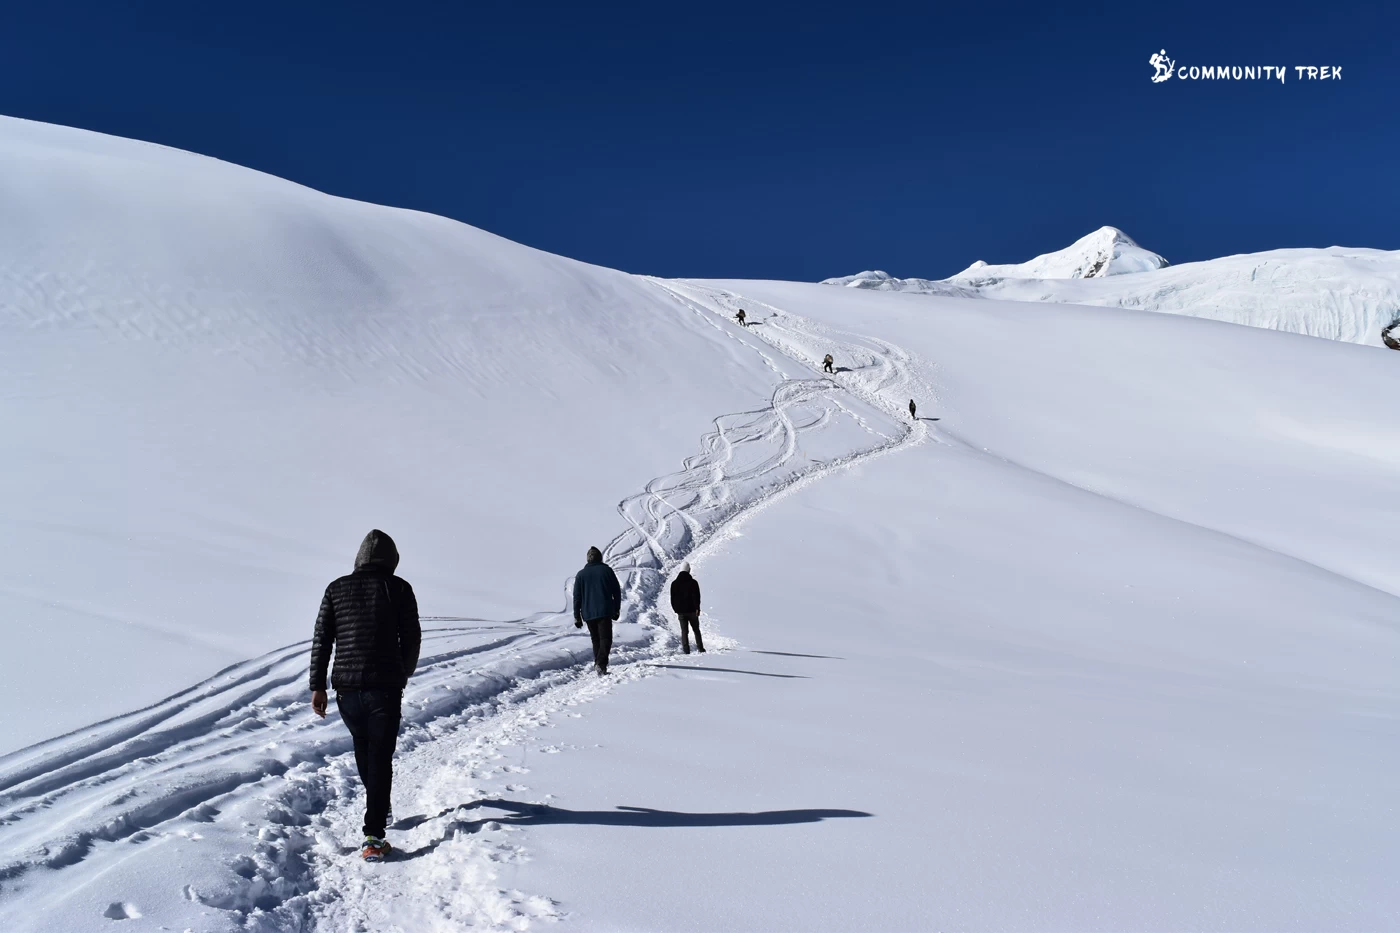
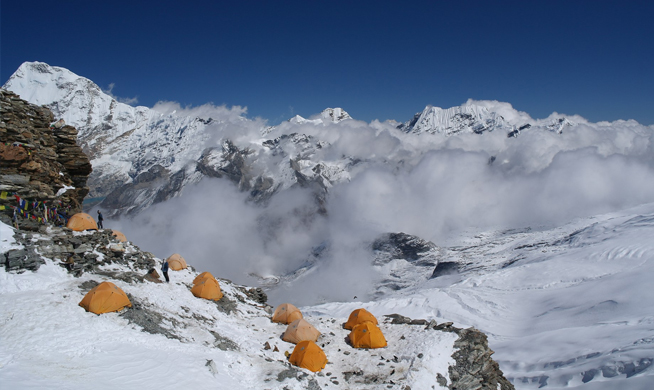
Camping & Guides:
Mera Peak is primarily a camping trek. While teahouses provide accommodation at lower altitudes, higher camps require tents and sleeping bags. Hiring a certified guide is highly recommended, especially for first-time climbers. They offer invaluable local knowledge and enhance safety.
Training & Fitness:
Prepare to conquer! Pre-expedition training is crucial. Focus on cardiovascular conditioning, strength training, and altitude simulation exercises. Strong physical and mental resilience are essential for navigating challenging terrain and high altitudes.
Gear and Equipment List for Mera Peak Climbing
To be successful in expedition and climbing we require better gear and also training is mandatory. Better gear and an expert team complete the journey with incredible achievements in time and at less cost. The required gears for Mera Peak are as mentioned.
- Climbing Boots: Successful peak climbing depends upon the comfort and safety of your feet. A proper pair of climbing boots is therefore a must. Properly insulated boots with additional stiffness and support are to be arranged. You need to be sure that they are compatible with the crampons.
- Crampons: A crampon is a grip (traction) device that is attached to the footwear to improve mobility on snow and ice during ice climbing. It is best to walk over glaciers, ice fields, and steep ice surfaces.
- Descender (Figure of Eight Lock)/Super 8: This is a shape of 8 devices made up of Aluminium. The figure of eight locks allows you to have very precise control over speed while descending. This friction brake is used in combination with a climbing harness and carabiner.
- Ascender (Jumar): It is a mechanical device that is attached to the rope to make ascending easy. It provides safety and additional support to ascending. It must be comfortable enough to be used with gloves or mittens. It can be best used on great walls and caving.
- Screw Gate/Carabiner/Karabiner: A carabiner is a special type of shackle that is used to connect components, especially for the protection of your harness. They are mostly used in rope. It is better to bring four carabiners, two lockings, and two unlockings.
- Ice Axe: It is a straight and shafted axe with a gently curved pick used for both ascending and descending in icy surfaces. It is a multi-purpose hiking and climbing tool because you can use it for digging, cutting steps, securing a harness or you can simply use it as a walking stick.
- Helmet-UIAA Test: It is always sensible to climb with a helmet. The helmet is basically for your safety and is quite essential while climbing. It is a must to protect your head from injuries because there might be unavoidable stone falls in the mountains. Get a UIAA-certified Helmet for your ultimate safety.
- Harness: It is a strap worn around the waist with loops to fit in your thighs. It is worn to secure you to a rope or an anchor. It must be well-fitted and comfortable.
- Prusik Rope/ Infinity Dry Rope: It is a knot to attach a loop of cord around a rope. The Prusik Loop is used in mountaineering, climbing, and tying knots. They are also used in rope rescue.
- Climbing Rope: Climbing ropes are normally categorized as static and dynamic. Static ropes are for abseiling. They are used as fixed ropes for ascending. Dynamic ropes, on the other hand, are used as belaying ropes to absorb the shock of a falling climber.
- Snow Bar: Snow bars or stakes are hammered or buried to secure the rope in place for the weight support of a climber. They are functional for fall protection and holding static loads.
- Ice Screw: Ice screw is a long screw used to hold a falling climber. It can be used both as running belays or anchors.
- Braking Belay Device: It is a mechanical piece of climbing equipment used to control a rope during belaying. It acts as a friction brake so that when a climber falls with any slack in the rope, the fall is stopped dramatically.
- Trekking Pole: It is a common hiking accessory used to assist walkers with their rhythm and provide stability on rough terrain, and steep slopes for long distances.
- Multi LED Headlamp and Spare Batteries: Headlamps are the most important to focus on your journey. The batteries may go dry during the long and extensive journey. So, be conscious enough to put in some spare batteries.
- Slings: It is a flexible strap or belt used in the form of a loop to support or raise a hanging weight.
- Altimeter: It is a device used for measuring the altitude of the place.
- U-Lock: The U-Lock is a small lock that is very essential while mountain hiking. They make better locks by creating a gaps as possible.
- Gloves (insulating): Gloves are used not only to keep your hands warm in the Himalayas. A good pair of gloves is used for climbing and making knots.
- Sleeping Bags: In high altitude, spending a night without a sleeping bag is meaningless. It not only protects your body against the cold, but it also ensures your relaxed sleeping.
- Survival Blankets: Survival blankets are very useful as they work as a useful first aid kit if someone is going into shock. Wrap the blanket around, tucking both sides under the feet to keep the cold out.
- Oxygen: It is better safe than sorry. You will never know when you will suffer from Acute Mountain Sickness. So walk solely, acclimatize, and bring enough bottles of oxygen.
Beyond the Climb:
Mera Peak is more than just a climb. It's an immersive experience into the Himalayas' beauty, culture, and potential. Are you ready to embark on this once-in-a-lifetime adventure?